背景
一直以来,都对linux系统的理解都是在应用层面,看过了《UNIX环境高级编程》,对于系统中的一些模块的实现方法还缺乏深刻的认识,故想研究下Linux内核机制。
单纯阅读源码还是不如一步一步调试内核理解深刻,对于调试内核的方法,网上也有不少,主要是利用Qemu+GDB对内核进行调试,但网上的资料大多零散,步骤记录不够详细,笔者在实现过程中走了很多弯路,而且直接利用GDB调试查看代码还不甚方便,所以这里使用VS Code+Qemu+GDB来进行Linux内核调试,记录过程中的主要步骤。
环境
由于个人主机是MacOS 10.14.5,所以在Parrales Desktop虚拟机使用Ubuntu 14.04 amd64搭建内核调试环境。
若主机本身就是Linux系统,则无需安装虚拟机,可直接进行内核调试环境的搭建,性能更佳。
主要步骤
概述
- 虚拟机(Parrales Desktop,vmware等均可)中安装Ubuntu(如果主机本身就是Linux系统,本步骤可略)
- 下载linux kernel,编译生成bzImage
- 更新GCC,G++,GDB
- 安装Qemu
- 安装VS Code,并进行相关配置
虚拟机Ubuntu安装
虚拟机(Parrales Desktop,vmware等均可)中安装Ubuntu 14.04,这里Ubuntu版本可以自由选择,只要Parrales tools能够正常安装即可。另外,最好选择x64版本,性能会更好一些。具体安装过程略。
由于原始apt更新速度较慢,需要更新国内源,这里使用清华apt源
vim /etc/apt/sources.list
内核编译
#安装编译相关依赖
apt-get install libncurses5-dev libssl-dev bison flex libelf-dev gcc make openssl libc6-dev

#这里选择清华源,国内速度会快很多
wget https://mirrors.tuna.tsinghua.edu.cn/kernel/v4.x/linux-4.5.tar.gz

#解压
tar -xvf linux-4.5.tar.gz

cd  linux-4.5
#配置编译选项,这里可以进行内核编译的各种配置,由于默认已经勾选了调试相关的配置,可直接esc退出保存
make menuconfig
#开始多线程编译,首次此步会等待较长时间,后续由于已经生成了中间文件,速度会变快
make -j8
编译完成后,目录下会生成以下
./vmLinux
./arch/x86/boot/bzImage
其中vmLinux为GDB所需的调试Map文件,bzImage为大内核文件
如果需要安装内核可以进行以下步骤(此步非必须)
#如果需要安装内核,
make modules_install
make install
安装后,重启主机,可以在Grub中选择新的内核。
更新GCC,G++,GDB
由于系统默认的GDB在调试内核时会出现“Remote ‘g’ packet reply is too long”的错误,我们需要修改GDB的源码,而编译新版的GDB源码需要新版的GCC和G++,故需要更新以下:
#安装GCC-9,G++-9
sudo apt install software-properties-common
sudo apt-get update
sudo apt install gcc-9 g++-9
#安装后执行
gcc -v
#若是新版本gcc,则完成,若非新版本,需要将gcc链接到gcc-9
编译安装GDB
#下载GDB,这里使用北交的gnu源,国内速度会快很多
wget https://mirror.bjtu.edu.cn/gnu/gdb/gdb-8.3.tar.xz
tar -xvf gdb-8.3.tar.xz

#在gdb/remote.c文件下作如下修改
    /* Further sanity checks, with knowledge of the architecture.  */
    // if (buf_len > 2 * rsa->sizeof_g_packet)
    //   error (_("Remote 'g' packet reply is too long (expected %ld bytes, got %d "
    //      "bytes): %s"),
    //    rsa->sizeof_g_packet, buf_len / 2,
    //    rs->buf.data ());
  if (buf_len > 2 * rsa->sizeof_g_packet) {
    rsa->sizeof_g_packet = buf_len;
    for (i = 0; i < gdbarch_num_regs (gdbarch); i++){
            if (rsa->regs[i].pnum == -1)
                continue;
            if (rsa->regs[i].offset >= rsa->sizeof_g_packet)
                rsa->regs[i].in_g_packet = 0;
            else
                rsa->regs[i].in_g_packet = 1;
        }
    }
#编译GDB
./configure
./make -j8
sudo ./make install
#打开GDB,看是否为新版本
gdb
Qemu配置
#安装qemu
apt-get install qemu
制作helloworld的rootfs用于测试
touch main.c
键入以下代码
#include <stdio>
int main()
{
    printf("hello world!");
    printf("hello world!");
    printf("hello world!");
    printf("hello world!");
    fflush(stdout);
    while(1);
    return 0;
}
编译
gcc --static -o helloworld main.c
echo helloworld | cpio -o --format=newc > rootfs
Qemu直接运行测试(非必须)
qemu-system-x86_64 \
    -kernel ./arch/x86/boot/bzImage \
    -initrd ./rootfs \
    -append "root=/dev/ram rdinit=/helloworld"
Qemu 开启GDB调试
qemu-system-x86_64  \
 -kernel ./arch/x86/boot/bzImage  \
 -initrd ./rootfs  \
 -append "root=/dev/ram rdinit=/helloworld" \
 -smp 2  \
 -s -S
进行以上会打开Qemu并进入等待调试状态,此时可以直接gdb调试,如下(非必须)
gdb ./vmLinux
#以下进行调试
target remote:1234
b start_kernel
c
可以发现内核被断在start_kernel函数上
VS code配置
官网下载安装vscode:https://code.visualstudio.com
1. vscode打开kernel源码文件夹
2. 安装gdb debug插件
3. Debug->Open Configurations,做以下配置
    {
    // Use IntelliSense to learn about possible attributes.
    // Hover to view descriptions of existing attributes.
    // For more information, visit: https://go.microsoft.com/fwlink/?linkid=830387
    "version": "0.2.0",
    "configurations": [
        {
            "name": "kernel-debug",
            "type": "cppdbg",
            "request": "launch",
            "miDebuggerServerAddress": "127.0.0.1:1234",
            "program": "${workspaceFolder}/vmlinux",
            "args": [],
            "stopAtEntry": false,
            "cwd": "${workspaceFolder}",
            "environment": [],
            "externalConsole": false,
            "logging": {
                "engineLogging": false
            },
            "MIMode": "gdb",
        }
    ]
    }
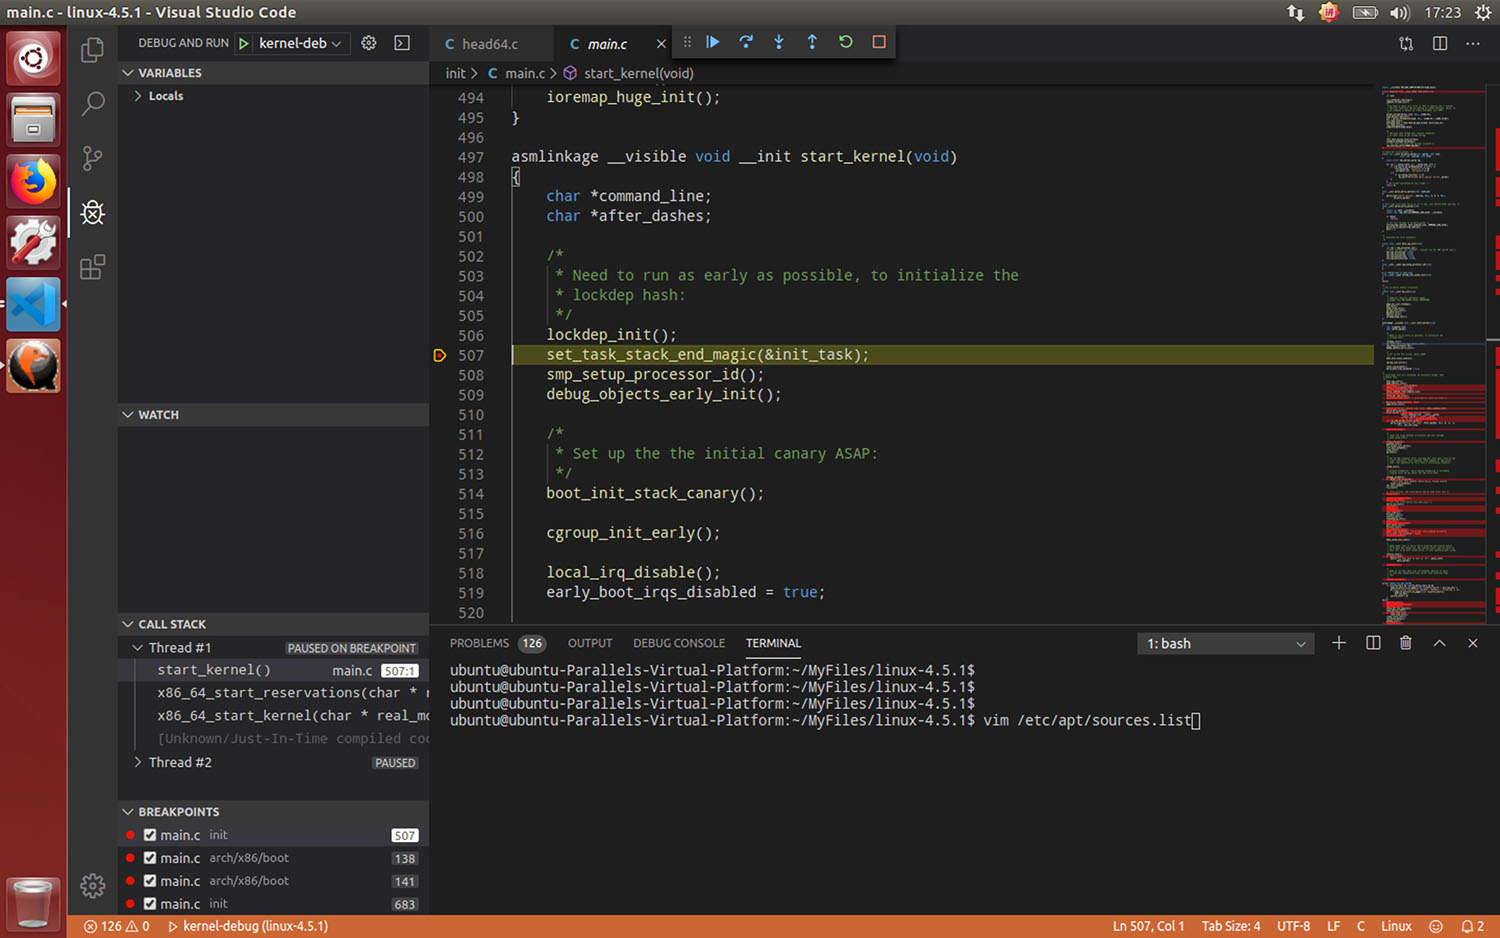
此时将断点设在init/main.c中的start_kernel函数中,然后Qemu 开启GDB调试,vscode start debug即可开始调试内核。